From Dated to Dreamy: My 4-Month DIY Bathroom Refresh Reveal
This post contains affiliate links. Read my full disclosure here.
They say a bathroom refresh should take a weekend. Mine? Try four months. Between client calls, soccer games, endless laundry, and that never-ending question of “What’s for dinner?” - my “simple” bathroom project stretched into a season of long weekends, wrong drill bits, and touch-and-go progress. But…it is finished and I did the work myself. And now, every time I walk into that bathroom, it feels like proof that we can create beauty in the middle of chaos.
Before we get to the fun part, here’s what I started with…


why a refresh
This is not my “forever” bathroom. I’ve got plans for a full primary suite renovation down the road. New layout, new finishes, the whole nine yards. But right now? It’s just not the priority. Between budgets, timelines, and the fact that a renovation would completely disrupt life in this house, I knew I wasn’t ready to dive in. Still, every time I walked into that bathroom, it felt like a space that didn’t belong to me. Outdated fixtures, bland walls, a mirror that didn’t exactly scream “good morning” — it just wasn’t the vibe.
So instead of waiting years to love the space I use every single day, I decided on a refresh. A handful of upgrades and just enough design personality to make it feel new — without investing heavily in things that will eventually get replaced when I do the full remodel. It was the best of both worlds: a space I actually enjoy living in now, and the flexibility to still go all out later.
SLOW, STEADY PROGRESS
Like every good project, this one started with a mood board. I wanted a clear vision so I didn’t end up with random paint colors or fixtures that didn’t work together. Once I had my palette and inspiration nailed down, it was time to start.
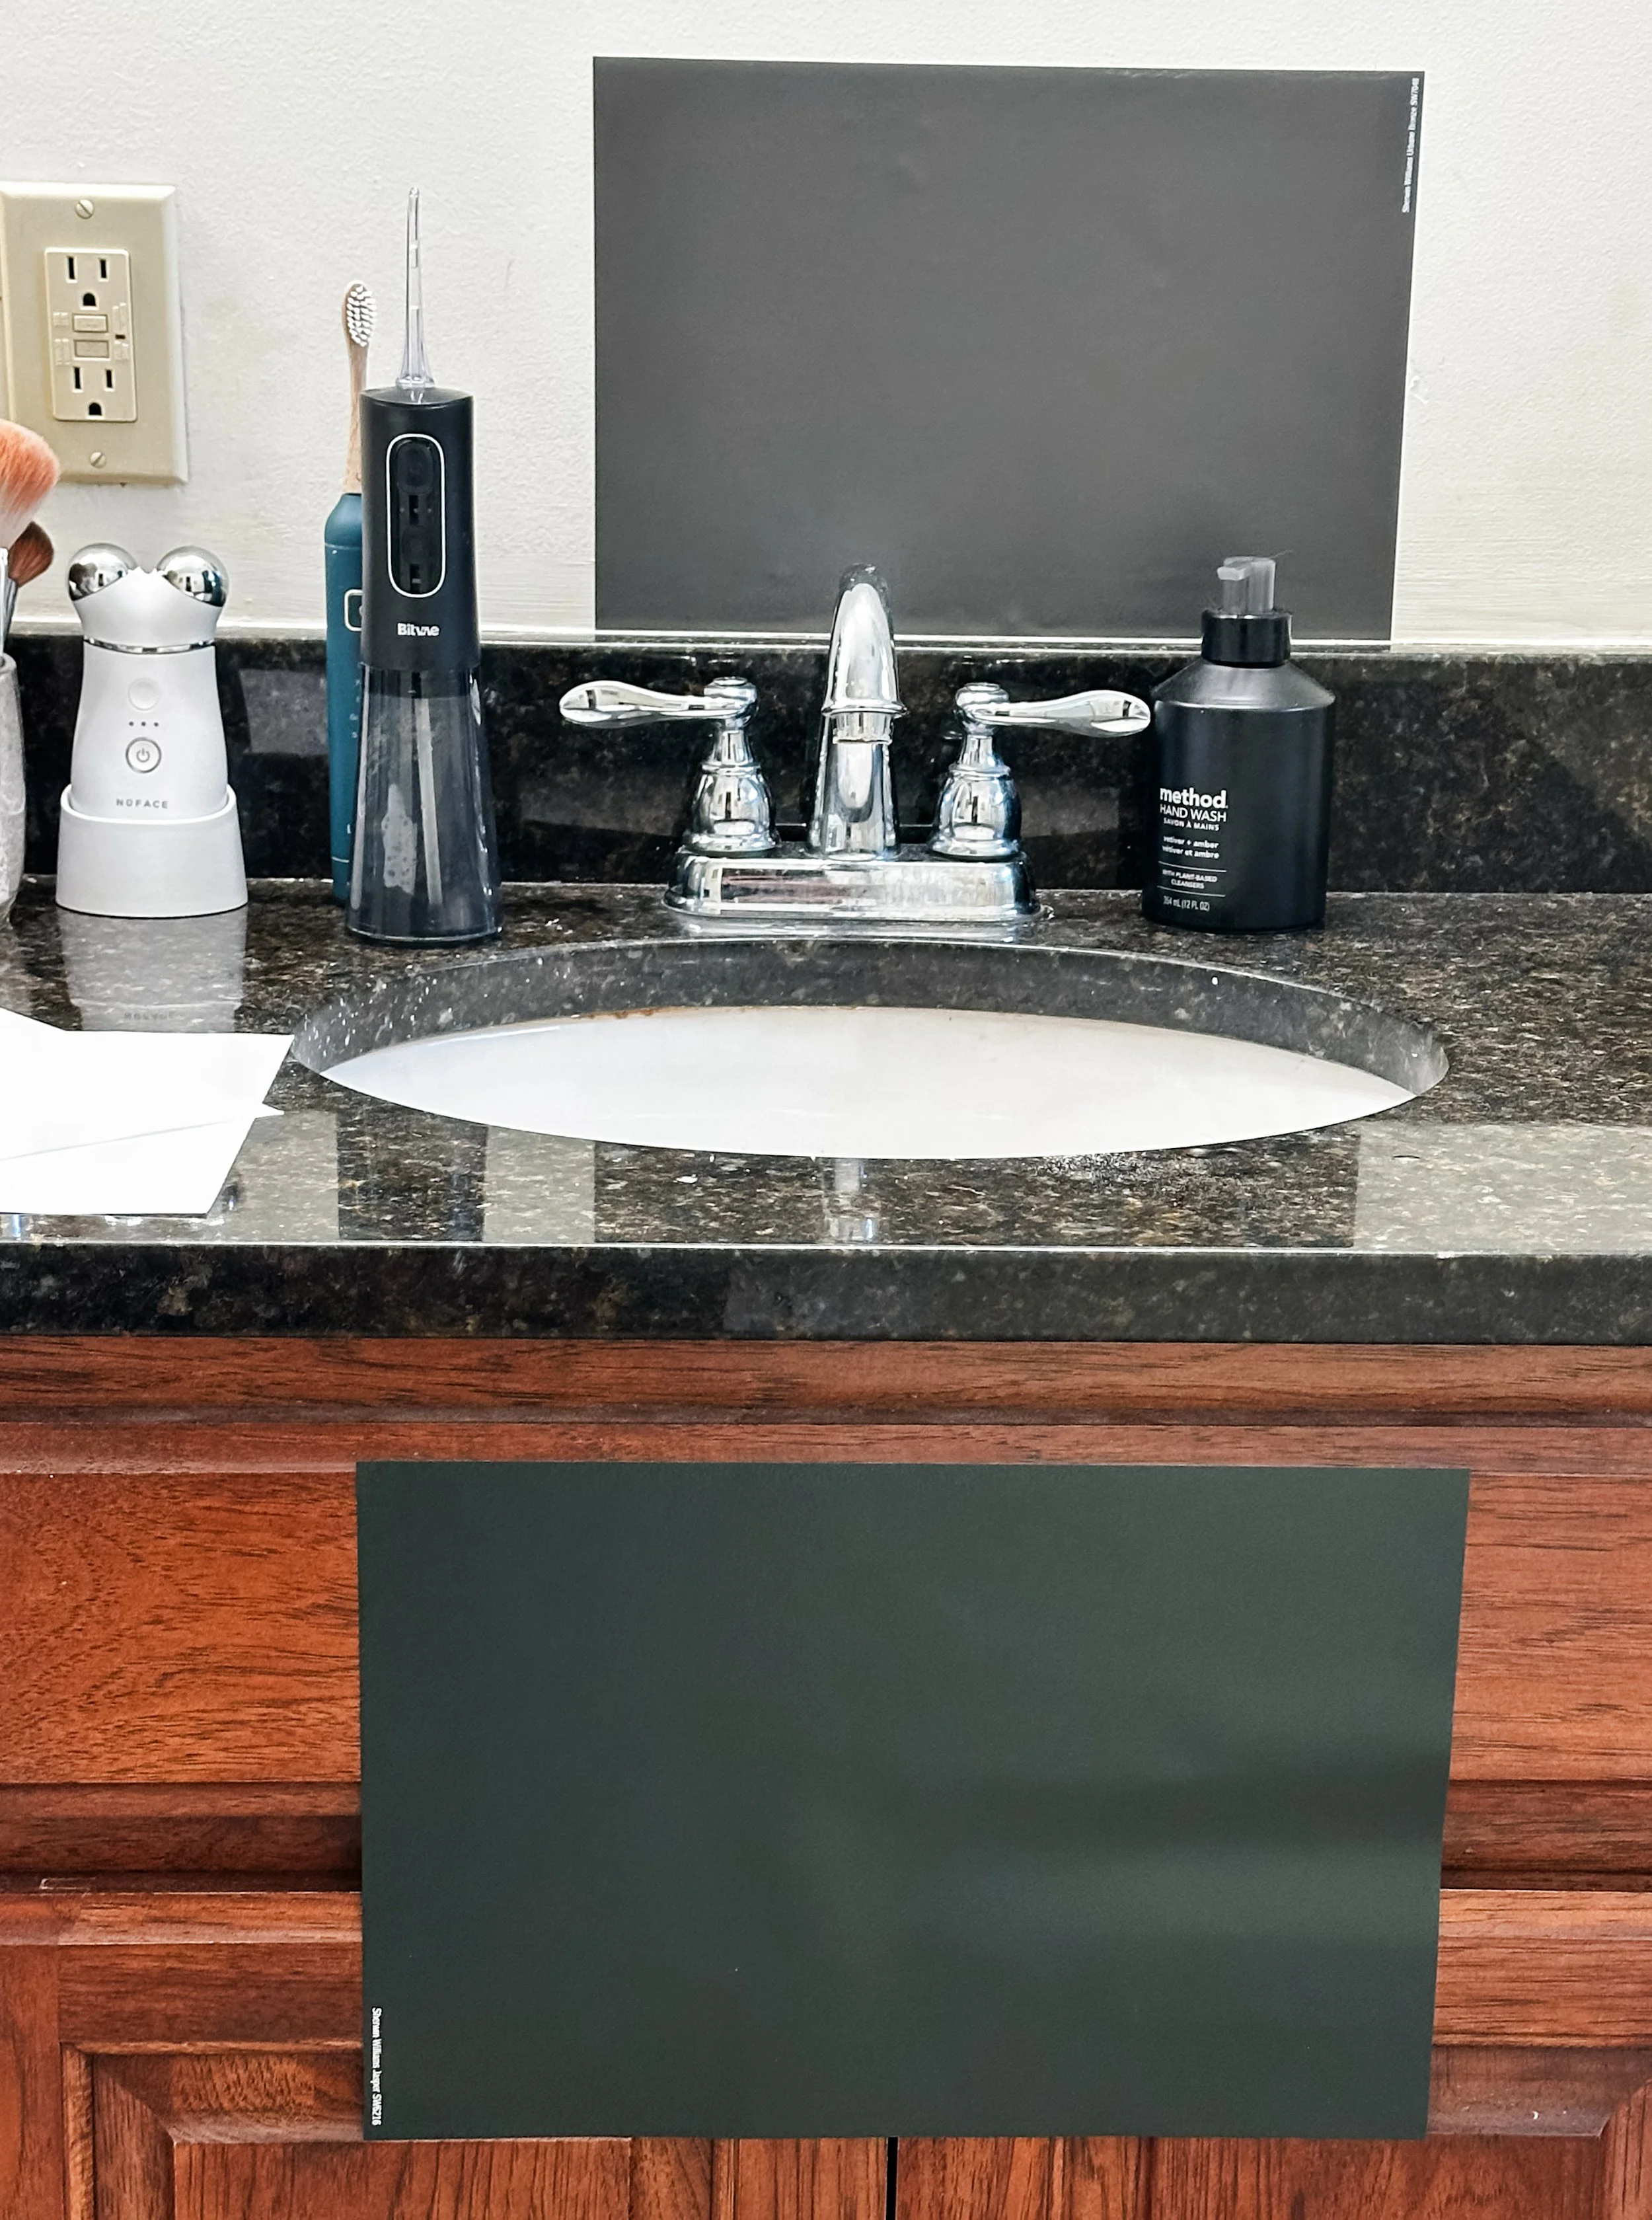
PAINT COLORS
I ordered peel-and-stick samples from Samplize - my first step when making paint color changes in any room. Once I settled on my colors, I started with the trim, then moved to the walls. Fresh paint instantly gave the whole space a cleaner, brighter feel. I saved the cabinets for the end of the project, which proved to be a wise move.

WALLPAPER
I knew I wanted something dark, and have always been drawn to big floral designs. I chose a bold pattern to bring personality to the room. It completely transformed the space and gave it that “designer touch” without the price tag.

MIRROR
Out went the dated builder-grade mirrors, in came a new full wall beauty. Honestly, I struggled with which direction to go on the mirror - full wall or two separate. I love the utility of a full-size mirror and liked how much of the wallpaper it would reflect, so I took the plunge. It instantly elevated the entire wall and gave me something to actually smile at in the mornings.

TOWEL BARS
Small detail, big impact. I created a towel bar wall near the shower with new gold hardware. It was a practical update that modernized the space and tied into the other finishes.
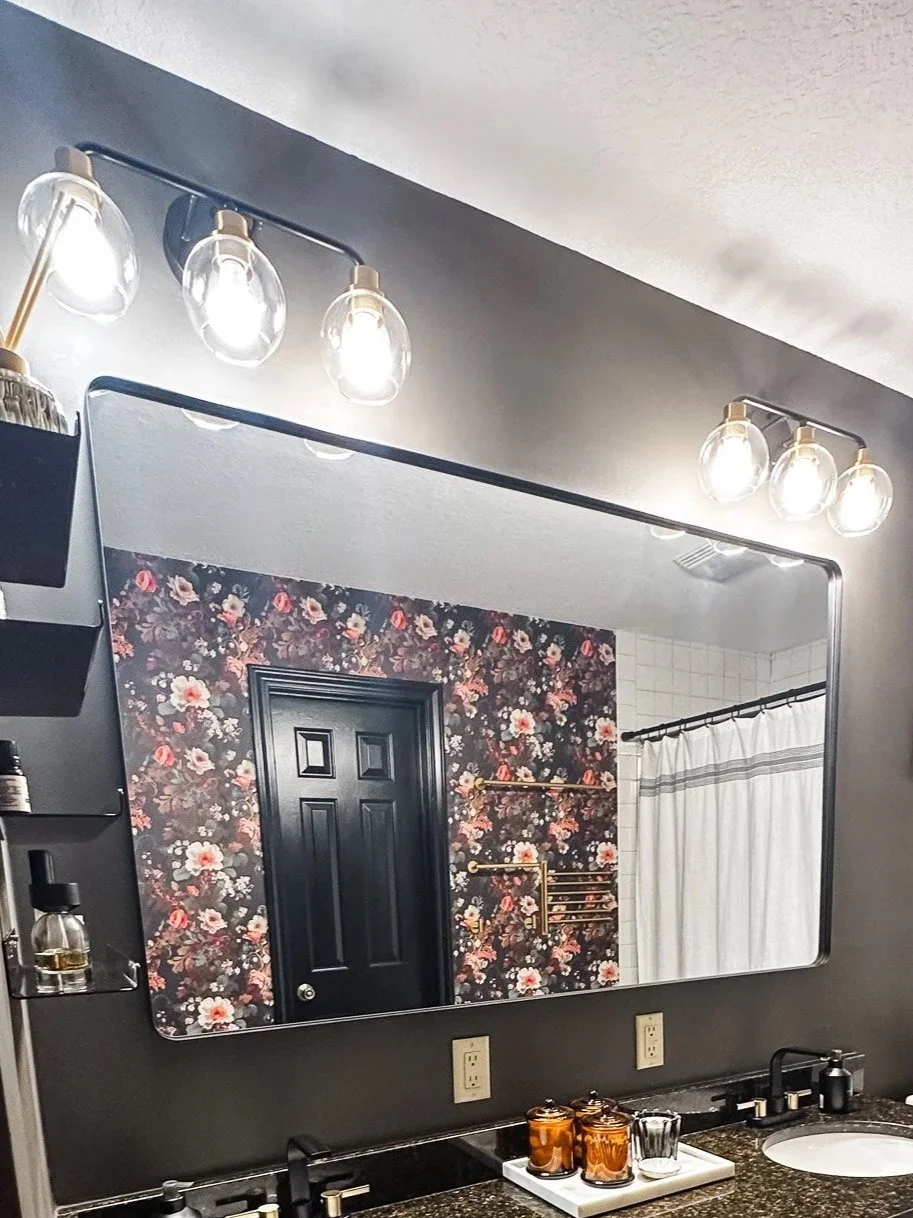
LIGHTING
Replacing the old lights with updated fixtures completely changed the mood of the room. I also added some simple motion-sensor under-cabinet lighting, which has been one of my favorite additions to the space. Lighting is one of the easiest (and most overlooked) upgrades in a bathroom.

FAUCETS
Swapping in sleek new faucets made the vanity look like it had a complete makeover, even though it’s the same countertop and sink.

DECOR + ORGANIZATION
Finally, I styled the space with new shelving for my favorite fragrances and essential oils, fresh towels, a few small accessories, and organized essentials so the counters stayed clutter-free.
Bit by bit, the bathroom began to feel intentional.
But, along the way, I had changed my mind multiple times on what to do with the cabinets. Initially, I was planning to paint them dark green. Then, as the wallpaper and paint went up, it became obvious that painting the cabinets yet another color would be too much. I decided to just keep them a natural wood, and planned to sand them down and re-stain them. That began to feel overwhelming as the project drug along over the course of several months, so I decided I would just leave them as they were. In the end though, they were bugging me! At the last minute, after everything else was finished, I decided to disassemble them, paint them the same color as the trim, and add hardware. This added another month to the project, but I’m so glad I did it. This final touch really pulled the whole space together.
The Challenges (a.k.a. Real Life)
The truth is this “simple” refresh stretched into a four-month marathon because life doesn’t exactly stop for DIY.
Right after I started the project, my client work picked up. Summer was winding down, my daughter was getting ready for her senior year, and I wanted to be fully present for those moments. Then came the first month of school — which, if you’re a parent, you know is absolute chaos. Between new schedules, client projects, and activities, the last thing on my list was hanging towel rods.
And then there were the DIY challenges:
I had never hung wallpaper before, so naturally my first attempt involved bubbles and a few muttered words.
I didn’t order enough rolls (rookie mistake), which meant waiting for more to arrive before I could finish.
A couple of products were delayed, forcing me to pause progress until everything came in.
In other words, this refresh happened in stolen pockets of time — late evenings, random Saturdays, moments squeezed in between deadlines and dinner duty. And honestly, that’s what makes it special. It wasn’t just about paint or wallpaper; it was about carving out space for creativity in the middle of real life.
The Reveal
After four months of slow, steady progress, I finally stepped back and took in the finished space. The verdict? I’m obsessed.


The wallpaper completely transformed the space, the new mirror and fixtures brought the whole room into this decade, and even the smallest details made it feel intentional. Walking in now feels less like “just another bathroom” and more like a space that reflects me - all the way down to my absolute favorite addition: two framed sketches drawn by my daughter.
That said — now that I’ve started refreshing other areas of the house and I’m honing in on my whole-home color palette, I’ve caught myself wondering if the wallpaper is the perfect match. But here’s the beauty of it: if I decide down the road to swap it for something that flows better, it’s an easy fix.
For now, though? It’s perfect. And it’s proof that you don’t need a full remodel to completely change the way a space makes you feel.
If you’ve been waiting for the “perfect time” to tackle that project, consider this your sign: start small, start messy…just start. It may take longer than you expect - most projects do! But you’ll be amazed what you can pull off in between real life. Comment below on the next project you want to tackle. And once you get started…let me know so I can cheer you on.
Want the same look? Find everything I used here.